Table of Contents
ToggleAppsFlyer Setup Guide for iOS and Android Apps (2026)
AppsFlyer is the world’s leading Mobile Measurement Partner (MMP) – but setting it up correctly is where most mobile teams struggle. A wrong SDK initialization, a missing SKAdNetwork ID, or an incorrect event parameter can silently break your entire attribution pipeline.
This appsflyer setup guide walks you through the complete AppsFlyer setup for iOS and Android – from account creation to SDK integration, event tracking, deep links, and ad network connections. Whether you’re setting up AppsFlyer for the first time or fixing a broken implementation, this appsflyer setup guide covers everything you need.
In this guide:
- What AppsFlyer does and why it matters
- How to create and configure your AppsFlyer account
- iOS SDK setup with ATT and SKAdNetwork
- Android SDK setup with GAID
- Custom event tracking
- Deep link configuration
- Ad network integrations
- How to validate your AppsFlyer setup
What Is AppsFlyer and Why Use It?
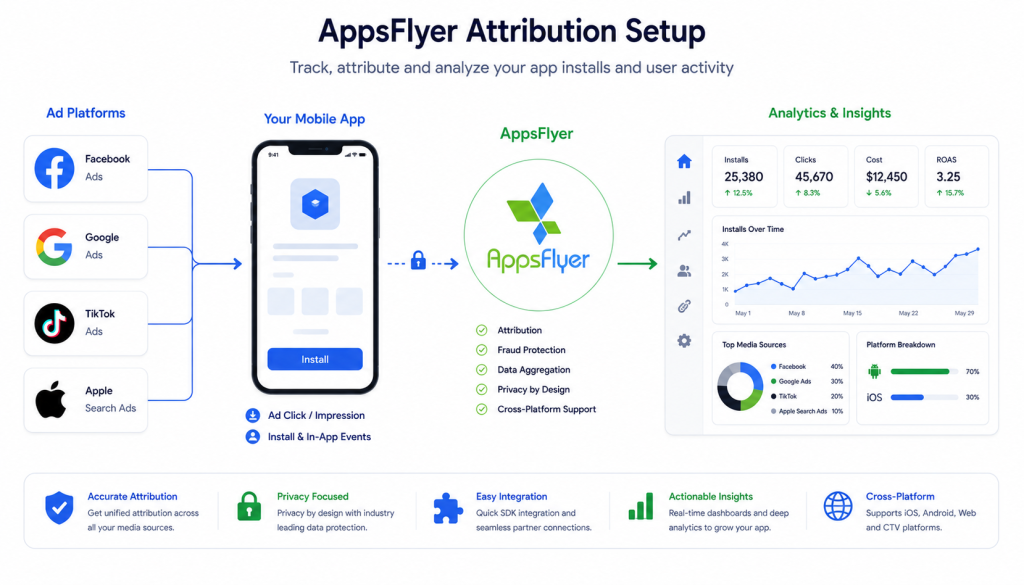
AppsFlyer is a mobile attribution and marketing analytics platform. It tells you exactly which ad campaigns, networks, and creatives are driving installs, events, and revenue in your app.
Why AppsFlyer:
- Trusted by 90,000+ apps globally
- Best-in-class iOS privacy-first attribution (ATT + SKAN)
- Fraud protection built-in
- Deep link solution (OneLink)
- Real-time dashboard and raw data export
AppsFlyer vs alternatives:
| Feature | AppsFlyer | Adjust | Singular |
|---|---|---|---|
| Market share | #1 | #2 | #3 |
| iOS SKAN support | Excellent | Excellent | Good |
| Fraud protection | Built-in | Built-in | Basic |
| Deep linking | OneLink | Dynamic Links | Basic |
| Cost aggregation | Good | Good | Excellent |
| Price | Premium | Premium | Mid-range |
Complete AppsFlyer Setup Guide: What You Need Before Starting
Before following this appsflyer setup guide, make sure you have:
– Admin access to your AppsFlyer account
– Access to your app’s source code
– App Store Connect or Google Play Console access
– Active ad network accounts (Facebook, Google, TikTok, etc.)
Step 1 — Create Your AppsFlyer Account
- Go to appsflyer.com
- Click “Get Started Free”
- Enter your company details
- Verify your email
- Log in to the AppsFlyer dashboard
Add your app:
- Dashboard → “Add App”
- Select platform (iOS or Android)
- Enter your App Store URL or Bundle ID
- Click “Add App”
Important: Create separate apps for iOS and Android — they have different Dev Keys.
Step 2 — Get Your Dev Key
Your Dev Key is the unique identifier that connects your app to AppsFlyer.
- Dashboard → App Settings
- Copy your Dev Key
- Keep this safe — you’ll need it for SDK initialization
Step 3 — iOS SDK Setup
Install AppsFlyer iOS SDK
CocoaPods:
ruby
pod 'AppsFlyerFramework'Swift Package Manager:
- Xcode → File → Add Packages
- Enter:
https://github.com/AppsFlyerSDK/AppsFlyerFramework
Configure ATT Permission
Add to Info.plist:
xml
<key>NSUserTrackingUsageDescription</key>
<string>This helps us provide you with personalized content and measure ad performance.</string>
Add SKAdNetwork IDs
Download the latest SKAdNetwork IDs from AppsFlyer and add to Info.plist:
xml
<key>SKAdNetworkItems</key>
<array>
    <dict>
        <key>SKAdNetworkIdentifier</key>
        <string>cstr6suwn9.skadnetwork</string>
    </dict>
    <!-- Add all AppsFlyer provided IDs -->
</array>
Initialize AppsFlyer iOS SDK
swift
import AppsFlyerLib
import AppTrackingTransparency

@main
struct MyApp: App {
    init() {
        AppsFlyerLib.shared().appsFlyerDevKey = "YOUR_DEV_KEY"
        AppsFlyerLib.shared().appleAppID = "YOUR_APP_ID"
        AppsFlyerLib.shared().isDebug = false // true only for testing
    }

    var body: some Scene {
        WindowGroup {
            ContentView()
                .onAppear {
                    // Request ATT permission first
                    if #available(iOS 14, *) {
                        ATTrackingManager.requestTrackingAuthorization { status in
                            AppsFlyerLib.shared().start()
                        }
                    } else {
                        AppsFlyerLib.shared().start()
                    }
                }
        }
    }
}
Critical: Always call start() AFTER ATT permission request — not before.
Step 4 — Android SDK Setup
Add AppsFlyer to build.gradle
Project-level:
gradle
repositories {
    mavenCentral()
}
App-level:
gradle
dependencies {
    implementation 'com.appsflyer:af-android-sdk:6.14.0'
    implementation 'com.android.installreferrer:installreferrer:2.2'
}
Add Permissions to AndroidManifest.xml
xml
<uses-permission android:name="android.permission.INTERNET" />
<uses-permission android:name="android.permission.ACCESS_NETWORK_STATE" />
<uses-permission android:name="com.google.android.gms.permission.AD_ID" />
Initialize AppsFlyer Android SDK
kotlin
import com.appsflyer.AppsFlyerLib
import com.appsflyer.AppsFlyerConversionListener

class MyApplication : Application() {
    override fun onCreate() {
        super.onCreate()

        val conversionListener = object : AppsFlyerConversionListener {
            override fun onConversionDataSuccess(data: MutableMap<String, Any>?) {
                // Handle conversion data
            }
            override fun onConversionDataFail(error: String?) {}
            override fun onAppOpenAttribution(data: MutableMap<String, Any>?) {}
            override fun onAttributionFailure(error: String?) {}
        }

        AppsFlyerLib.getInstance().init("YOUR_DEV_KEY", conversionListener, this)
        AppsFlyerLib.getInstance().start(this)
    }
}
Important: Initialize in Application class, not in Activity.
Step 5 — Track Custom Events
Custom events are the core of your attribution data. Track every meaningful user action.
iOS (Swift):
swift
// Registration
AppsFlyerLib.shared().logEvent(
    AFEventCompleteRegistration,
    withValues: [AFEventParamRegistrationMethod: "email"]
)

// Purchase
AppsFlyerLib.shared().logEvent(
    AFEventPurchase,
    withValues: [
        AFEventParamRevenue: 29.99,
        AFEventParamCurrency: "USD",
        AFEventParamOrderId: "order_12345",
        AFEventParamContentId: "premium_plan"
    ]
)

// Custom event
AppsFlyerLib.shared().logEvent(
    "subscription_started",
    withValues: [
        "plan_type": "annual",
        "trial": false
    ]
)
Android (Kotlin):
kotlin
// Registration
val registrationValues = mapOf(
    AFInAppEventParameterName.REGISTRATION_METHOD to "email"
)
AppsFlyerLib.getInstance().logEvent(
    context,
    AFInAppEventType.COMPLETE_REGISTRATION,
    registrationValues
)

// Purchase
val purchaseValues = mapOf(
    AFInAppEventParameterName.REVENUE to 29.99,
    AFInAppEventParameterName.CURRENCY to "USD",
    AFInAppEventParameterName.ORDER_ID to "order_12345"
)
AppsFlyerLib.getInstance().logEvent(
    context,
    AFInAppEventType.PURCHASE,
    purchaseValues
)
Recommended Events to Track:
| Event | AF Constant | Key Parameters |
|---|---|---|
| Registration | AFEventCompleteRegistration | method |
| Login | AFEventLogin | method |
| Purchase | AFEventPurchase | revenue, currency, order_id |
| Add to Cart | AFEventAddToCart | content_id, price |
| Tutorial Complete | AFEventTutorial_completion | success |
| Level Complete | AFEventLevelAchieved | level, score |
Step 6 — Configure OneLink Deep Links
OneLink is AppsFlyer’s deep linking solution — it handles both deferred deep links (for new installs) and direct deep links (for existing users).
Create OneLink:
- AppsFlyer Dashboard → OneLink → OneLink Template
- Create template with your app’s Bundle ID and Package Name
- Configure fallback URLs for web
iOS Universal Links:
- Add Associated Domains in Xcode:
applinks:yourapp.onelink.me- Add to
Info.plist:
xml
<key>NSUserActivityTypes</key>
<array>
    <string>NSUserActivityTypeBrowsingWeb</string>
</array>- Handle in SwiftUI:
swift
.onOpenURL { url in
    AppsFlyerLib.shared().handleOpen(url, options: [:])
}
.onContinueUserActivity(NSUserActivityTypeBrowsingWeb) { activity in
    AppsFlyerLib.shared().continue(activity, restorationHandler: nil)
}
Android App Links:
xml
<!-- AndroidManifest.xml -->
<intent-filter android:autoVerify="true">
    <action android:name="android.intent.action.VIEW" />
    <category android:name="android.intent.category.DEFAULT" />
    <category android:name="android.intent.category.BROWSABLE" />
    <data android:scheme="https"
          android:host="yourapp.onelink.me" />
</intent-filter>
Step 7 — Connect Ad Networks
For each active ad network, configure the integration in AppsFlyer:
- AppsFlyer Dashboard → Integrate → Partner Marketplace
- Search for your ad network (Facebook, Google, TikTok, etc.)
- Enable the integration
- Enter API credentials
- Configure attribution windows
Standard attribution windows:
- Click-through: 7 days
- View-through: 1 day
- Re-engagement: 30 days
Facebook/Meta Setup:
- Enable Meta integration in AppsFlyer
- Add your Meta App ID
- Enable AEM (Aggregated Event Measurement) for iOS
- Map AppsFlyer events to Meta standard events
Google Ads Setup:
- Link Google Ads account to AppsFlyer
- Enable parallel tracking
- Import AppsFlyer conversions into Google Ads
- Set up conversion actions
Step 8 — Validate Your AppsFlyer Setup
Never assume your setup is working. Always validate.
Method 1 — AppsFlyer Real-Time Testing:
- Dashboard → “Test Device” → Add your device IDFA/GAID
- Open your app on the test device
- Check Dashboard → “Real-time active users”
Method 2 — Debug Mode:
swift
// iOS
AppsFlyerLib.shared().isDebug = true
kotlin
// Android
AppsFlyerLib.getInstance().setDebugLog(true)
Check Xcode/Logcat for AppsFlyer logs.
Method 3 — AppsFlyer Validation Tool:
Use AppsFlyer’s SDK Integration Wizard to verify your setup step by step.
Validation Checklist:
- Install event fires on fresh install
- Custom events appear in real-time dashboard
- Revenue events show correct amount and currency
- Deep links open correct screen
- SKAN postbacks appearing (iOS)
- Ad network integrations showing data
Completing this appsflyer setup guide validation checklist ensures your attribution data is accurate. Even with a proper appsflyer setup guide, these common mistakes can still break your attribution silently.
Common AppsFlyer Setup Mistakes
Mistake 1 — Calling start() Before ATT
On iOS, always request ATT permission first, then call start(). Reversing this order means you lose IDFA for attributed users.
Mistake 2 — Same Dev Key for Dev and Production
Use separate AppsFlyer apps for development and production. Mixing them corrupts your production data permanently.
Mistake 3 — Missing SKAdNetwork IDs
If you run paid campaigns on iOS and your Info.plist is missing ad network SKAdNetwork IDs, those campaigns cannot be attributed via SKAN.
Mistake 4 — Not Setting User ID
Call setCustomerUserID() immediately after user login. Without this, you can’t track users across devices or sessions.
swift
AppsFlyerLib.shared().customerUserID = "your_user_id"Mistake 5 — Wrong Revenue Currency
Always send revenue in the original currency of the transaction. Don’t convert to USD before sending — AppsFlyer handles currency conversion.
Mistake 6 — Debug Mode in Production
Always set isDebug = false before releasing to production. Debug mode sends extra network calls and can slow down your app.
AppsFlyer Setup for Flutter Apps
If you’re using Flutter, use the official AppsFlyer Flutter plugin:
yaml
# pubspec.yaml
dependencies:
  appsflyer_sdk: ^6.14.0
dart
import 'package:appsflyer_sdk/appsflyer_sdk.dart';

final AppsflyerSdk appsflyerSdk = AppsflyerSdk({
  "afDevKey": "YOUR_DEV_KEY",
  "afAppId": "YOUR_APP_ID", // iOS only
  "isDebug": false,
  "timeToWaitForATTUserAuthorization": 60 // seconds to wait for ATT
});

await appsflyerSdk.initSdk(
  registerConversionDataCallback: true,
  registerOnAppOpenAttributionCallback: true,
);
Following this appsflyer setup guide step by step will give your team accurate attribution data across iOS and Android. If you need help with your AppsFlyer setup, feel free to reach out.
FAQ
How do I get my AppsFlyer Dev Key? Log in to your AppsFlyer dashboard, go to App Settings, and copy the Dev Key shown at the top of the page. Each app has a unique Dev Key.
Do I need a separate AppsFlyer account for iOS and Android? No — one account can manage multiple apps. But you need to add iOS and Android as separate apps in the dashboard, as they have different Dev Keys and settings.
How long does it take for AppsFlyer data to appear? Install data appears in real-time. Most reports update within a few minutes. SKAN data has a delay of 24-72 hours depending on the postback window.
Is AppsFlyer free to use? AppsFlyer offers a free tier with limited monthly active users. Paid plans start based on MAU volume. Most growing apps will need a paid plan once they scale.
What is the difference between AppsFlyer and Firebase Analytics? AppsFlyer handles install attribution — tracking which ad campaign drove an install. Firebase Analytics tracks in-app behavior after install. They complement each other and can share event data.
How do I track in-app purchases in AppsFlyer? Use the AFEventPurchase event with parameters: AFEventParamRevenue, AFEventParamCurrency, and AFEventParamOrderId. Always include all three parameters for accurate revenue attribution.
Can AppsFlyer track web-to-app conversions? Yes. Use AppsFlyer’s SmartScript or OneLink to track users who click a web link and install the app, attributing the install back to the original web source. Following this appsflyer setup guide will ensure accurate attribution from day one.